Introduction
This is the 6th blog post in the (ahem) series of 5 on the DB2 for z/OS native REST interface. The previous entries are:
- DB2 Native REST API – Getting Started
- DB2 Native REST API – Creating Services
- DB2 Native REST API – A Sample REST Application
- DB2 Native REST API – Security
- DB2 Native REST API – BLOBs, CLOBs and Stored Procedures
This bonus one has come about following a query from a colleague, and relates to making use of node.js with the interface.
What Is node.js?
Lots of definitions for this out on the internet:
- js: https://nodejs.org/en/about/
- Wikipedia: https://en.wikipedia.org/wiki/Node.js
- TutorialsPoint: https://www.tutorialspoint.com/nodejs/nodejs_introduction.htm
I’d probably summarize these into: JavaScript for server-side function – a sort of JS alternative to PHP, which I’ve used a lot in the other articles in this series to create and drive services.
Creating a Simple REST Service
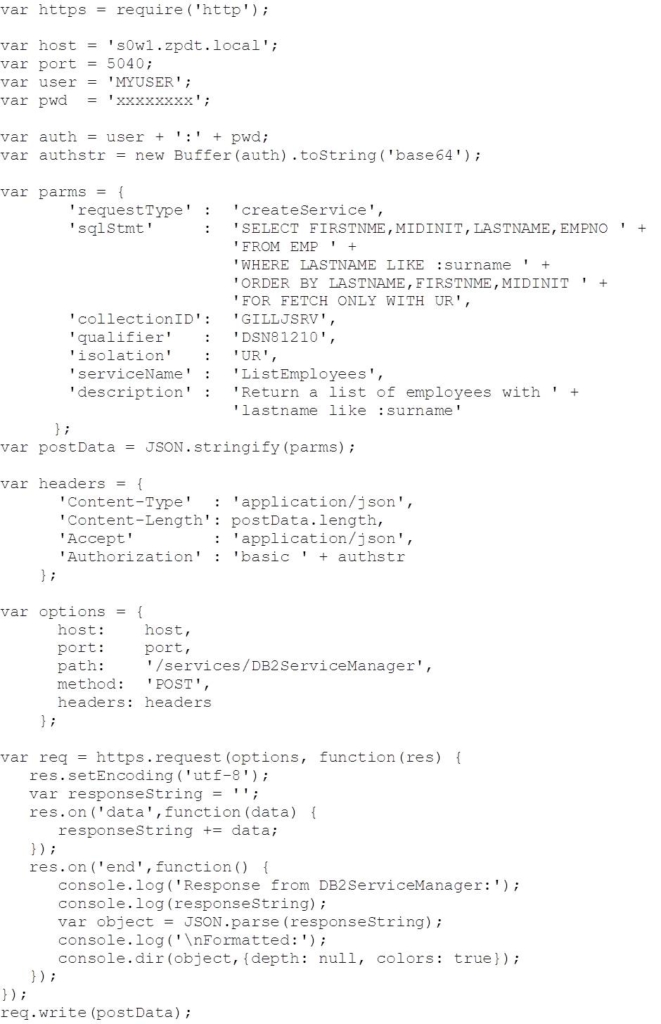
Much like the PHP samples that we reviewed in previous blog postings (see blog #2), creating a REST service in DB2 for z/OS using node.js is quite straightforward – build the createService request into the data to post to the DB2 ServiceManager, then drive the request:
This returned:
Making A Simple REST Request
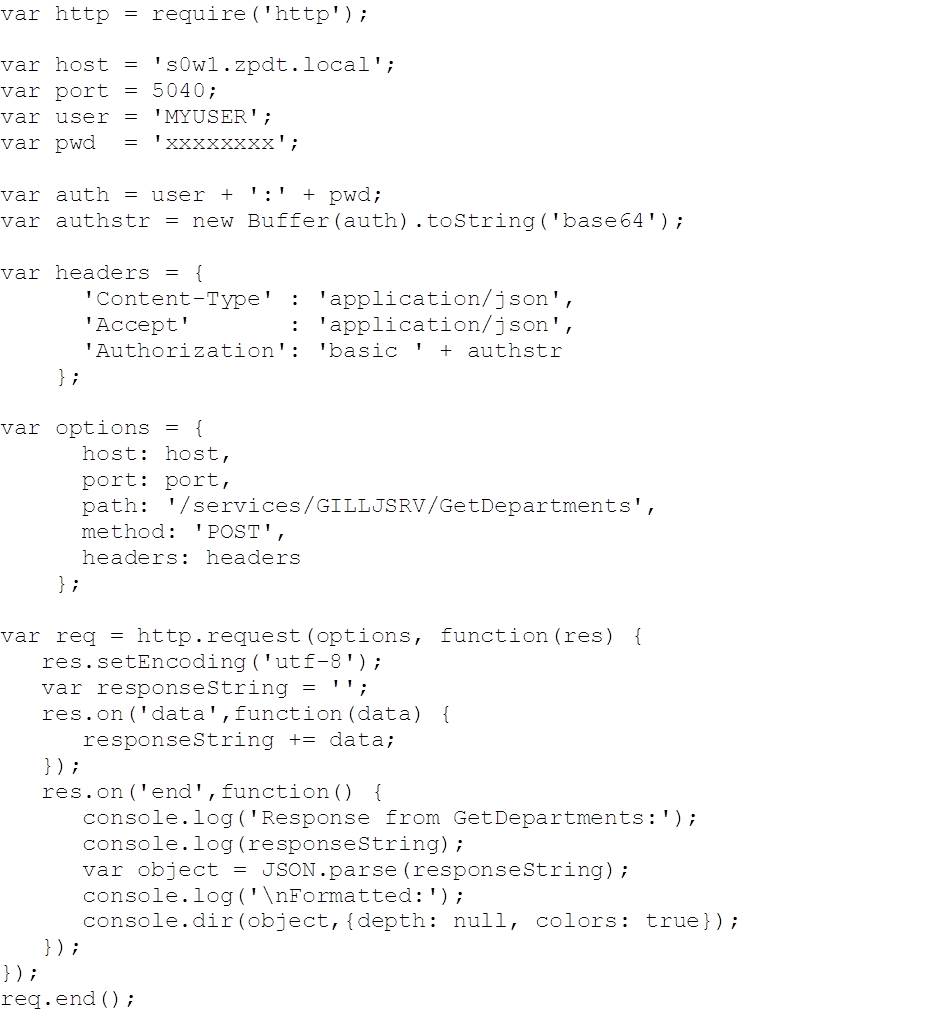
Probably the biggest difference when working with node.js is the async nature of the I/O – you create the I/O request and then attach handlers to manage things asynchronously for you. In the following example, we create a request, then attach handlers for receiving data (‘data’) and completing (‘end’) the request response. Note that:
- We’re using Basic authentication – base64 encoded userid and password, established in the ‘Authorization’ header
- The request (‘req’) is initialized with the ‘options’ which define the target URL, method and headers, and then further configured by the inline function
- No parameters on this one – GetDepartments (cf DB2 REST API blog post #3)
- Once defined, the request is sent using req.end()
Code:
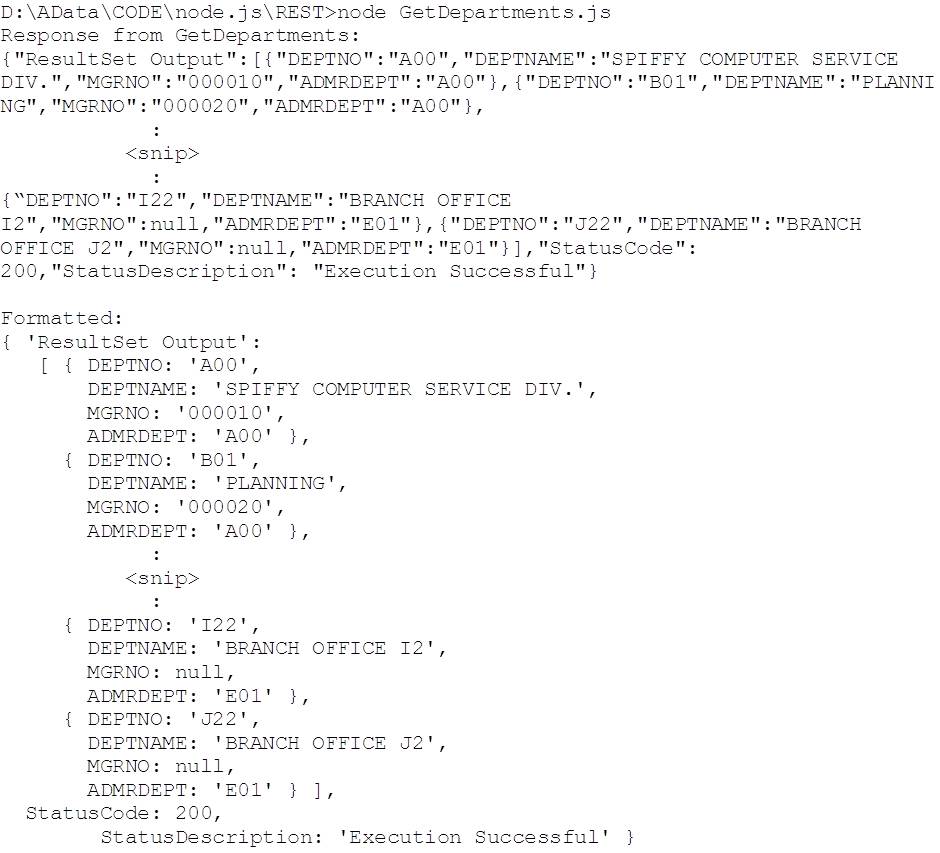
And here’s the corresponding output:
Note the use of the dir() method on console to produce the formatted output.
Making an AT-TLS Encrypted REST Request
As interesting as the first example is, in reality, you’re probably going to want to make your connections to REST over SECPORT – i.e. with AT-TLS encryption. The following code is an example of how you can do this. It makes use of two certificates – both generated in RACF in our case:
- pem – this is the RACF Certficate Authority certificate. It needs to be available on the node server so that node knows that it can trust certificates signed with it. DB2 for z/OS will send it the server one as part of establishing the HTTPS secure conversation (c.f. blog #4 on security).
- p12 – this is the client certificate, which node will use to authenticate it’s connection to REST and DB2 for z/OS. This is associated with user ADCDA (see below).
The following are some notes on how we created these:
zpdtca.pem
This is the Certificate Authority certificate used to sign other certificates in RACF. It was originally created in TSO like this:
We then exported it like this:
The output is the default DER encoded X.509 certificate that is formatted in base64. This is then downloaded in ASCII format as zpdtca.pem.
zpdt_webclient.p12
This is the client certificate for the REST requestor layer. It is associated with RACF ID ADCDA and was created in RACF using the following TSO command:
We then exported it like this:
The output is in PKCS#12 binary format. This was then downloaded in BINARY format as zpdt_webclient.p12
To use this with Javascript, we’ll extract the key and certificate files from the p12 one using the openssl command:
Both commands prompt for the PKCS#12 password (SAUSAGE – cf RACDCERT EXPORT, above).
Making the REST Request
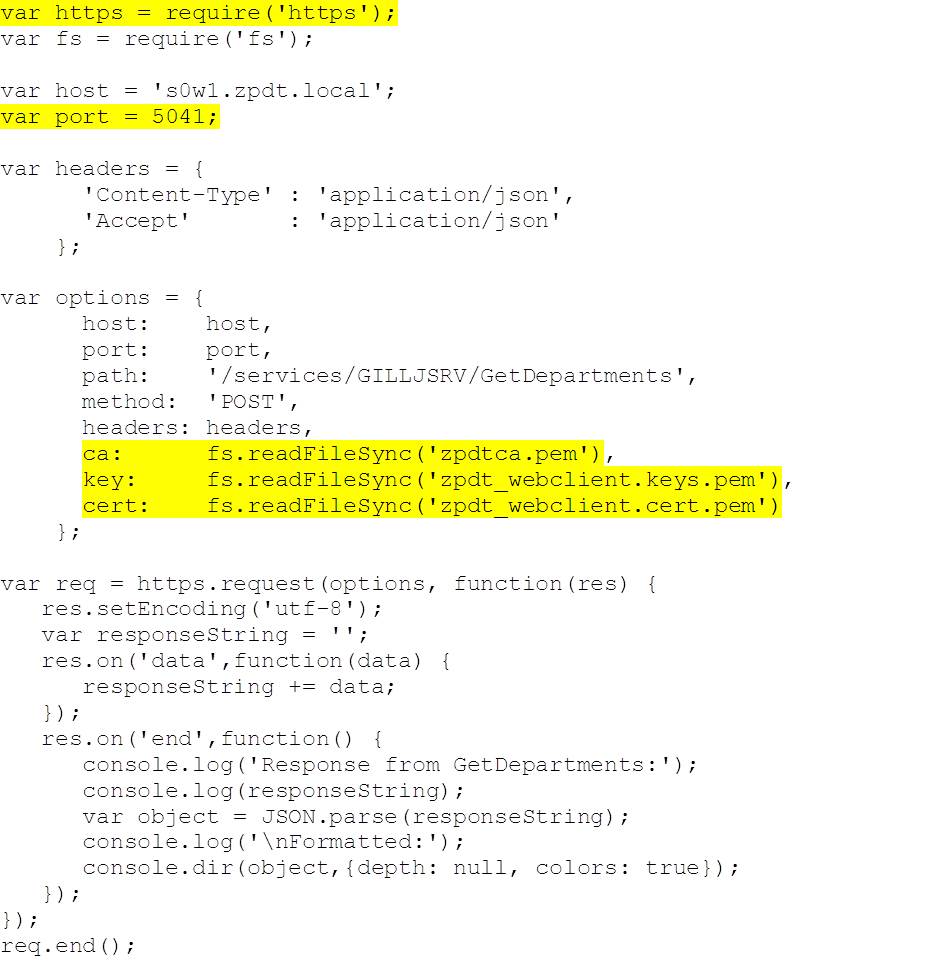
The following code makes the same (GetDepartments) REST request, but this time using https and port 5041. Note that, we’re passing the certificate authority certificate (‘ca’ option) and the client key (‘key’ option) and certificate (‘cert’ option) instead of using plain text userid and password – so there’s no ‘Authorization’ header. The rest of the code is unchanged:
The output from running this (node driveTLSGetDepartments) is the same as the first example.
Creating a node Server
The examples that we’ve looked at so far are interesting, as they show how to make a request, but it would be nice to see how we can pull it all together into a node server. To do this, we’ve reproduced our sample application from blog 3 as a node server. The code can be downloaded from github:
https://github.com/db2dinosaur/db2-rest-node-sample
The static elements (in public) include jquery.min.js at v3.1.0 to provide support for client-side JavaScript elements (see staff.html in the same directory / public.zip from github – above).
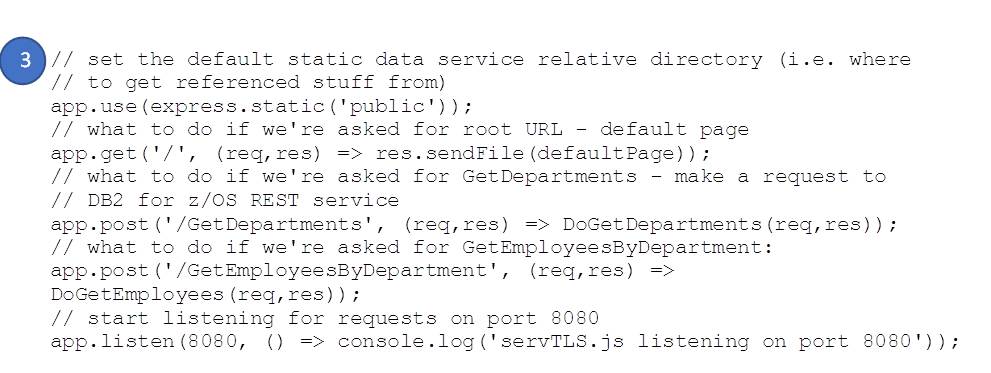
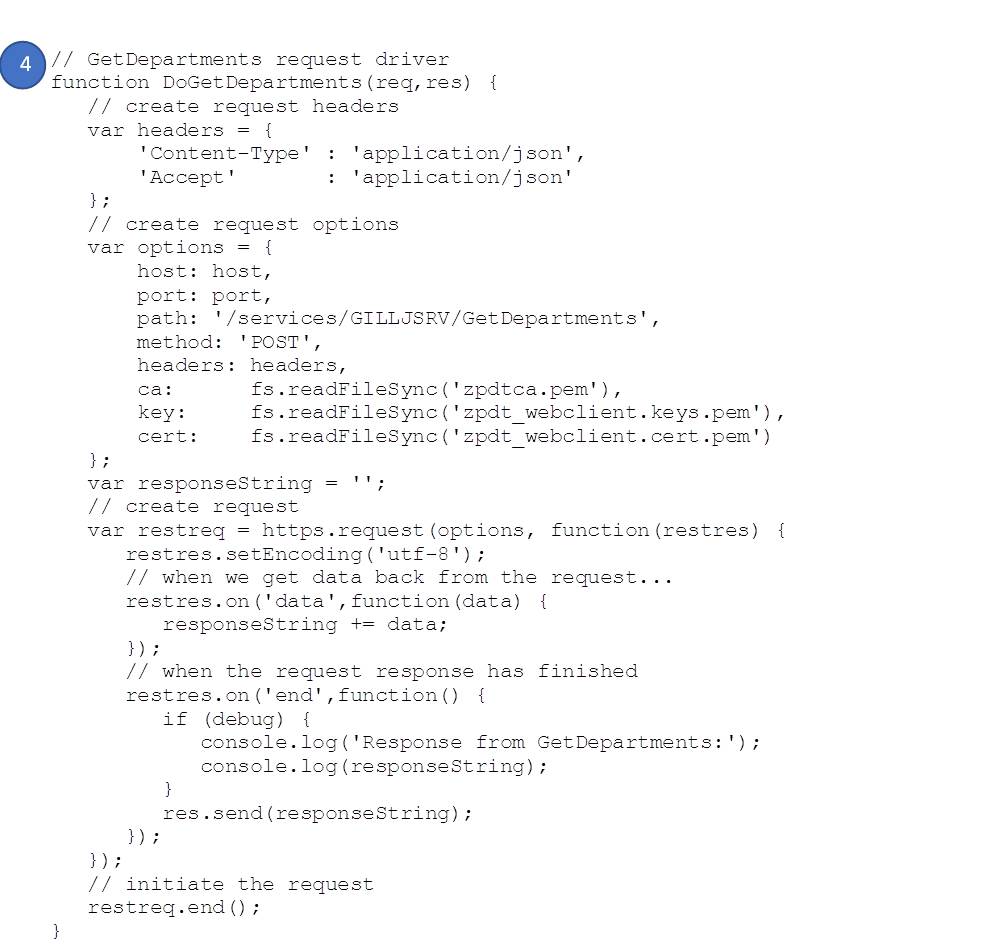
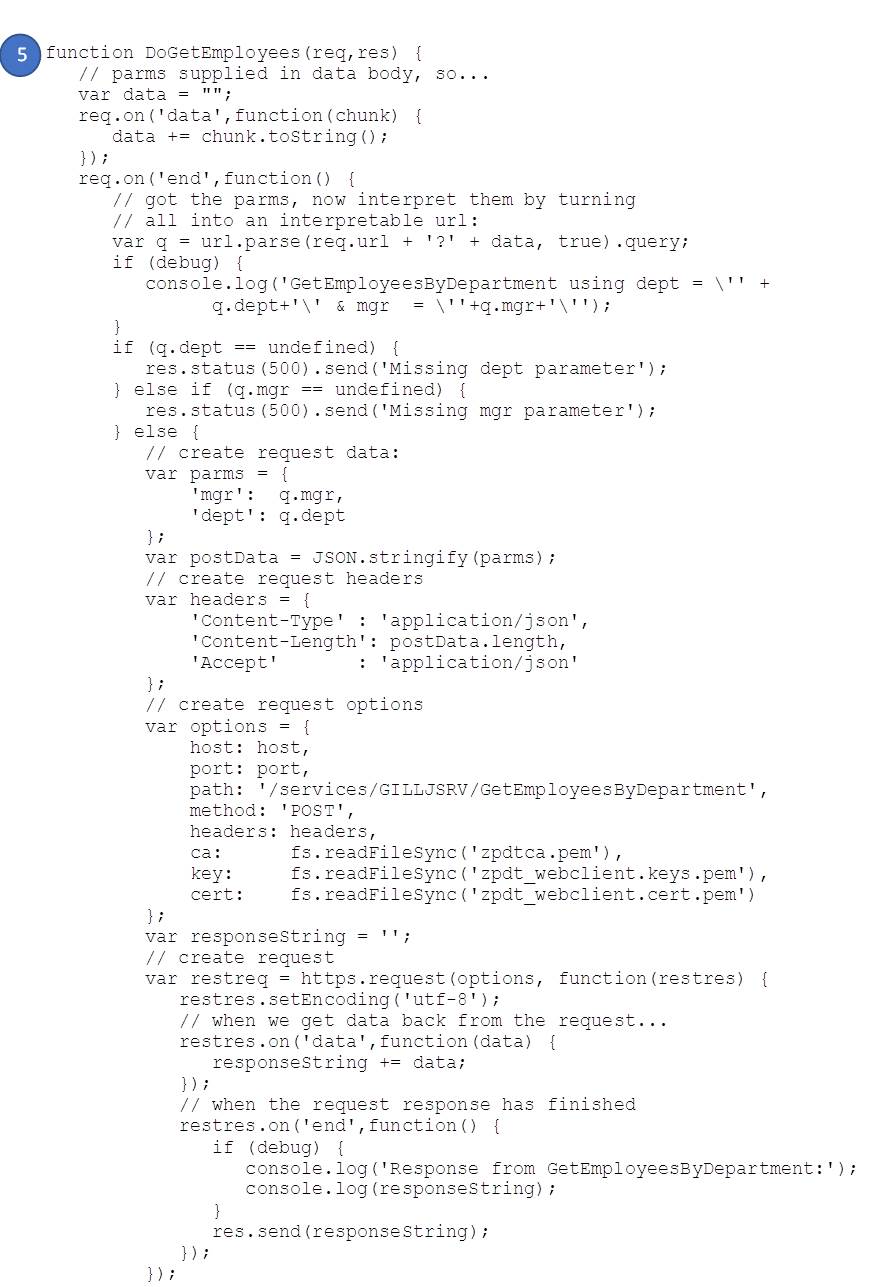
We’re using the express framework (https://expressjs.com/) in this example as it dramatically simplifies the solution. The highlighted key sections in servTLS.js are as follows:
- Additional packages / requires references
- Config
- Server
- POST GetDepartments handler – which you’ll recognize from above
- POST GetEmployeesByDepartment handler (including parameter handling)
node servTLS
and wait for:
and then point your browser at:
https://localhost:8080
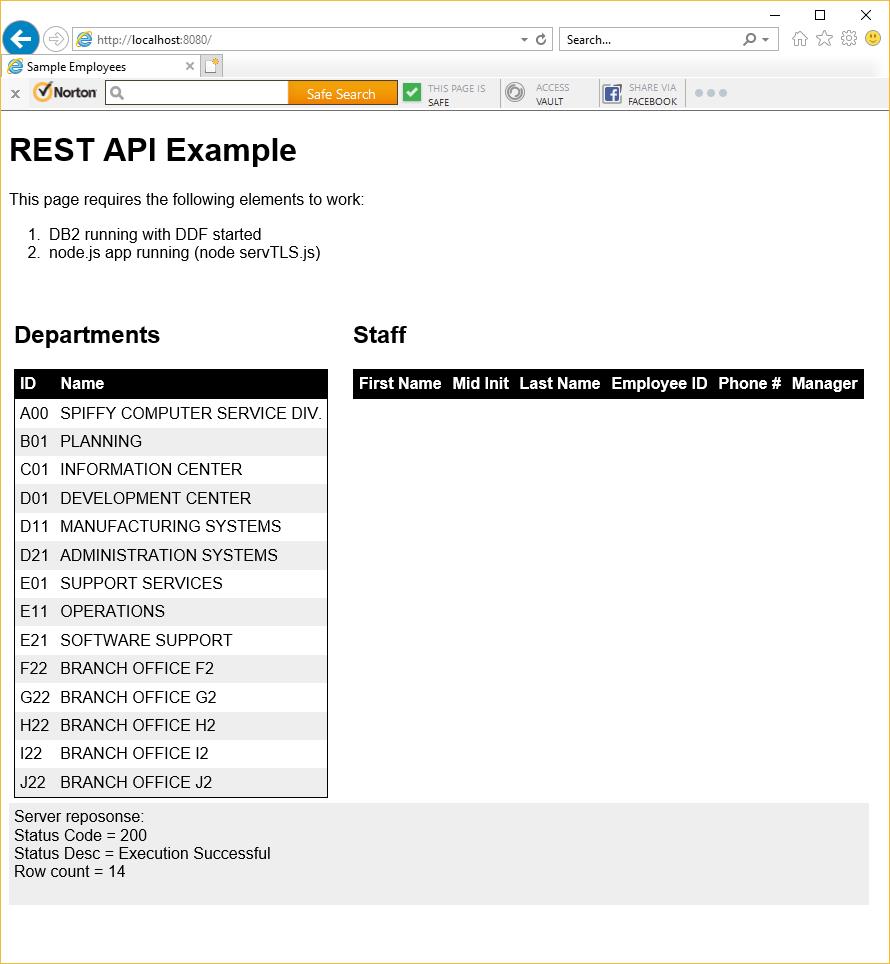
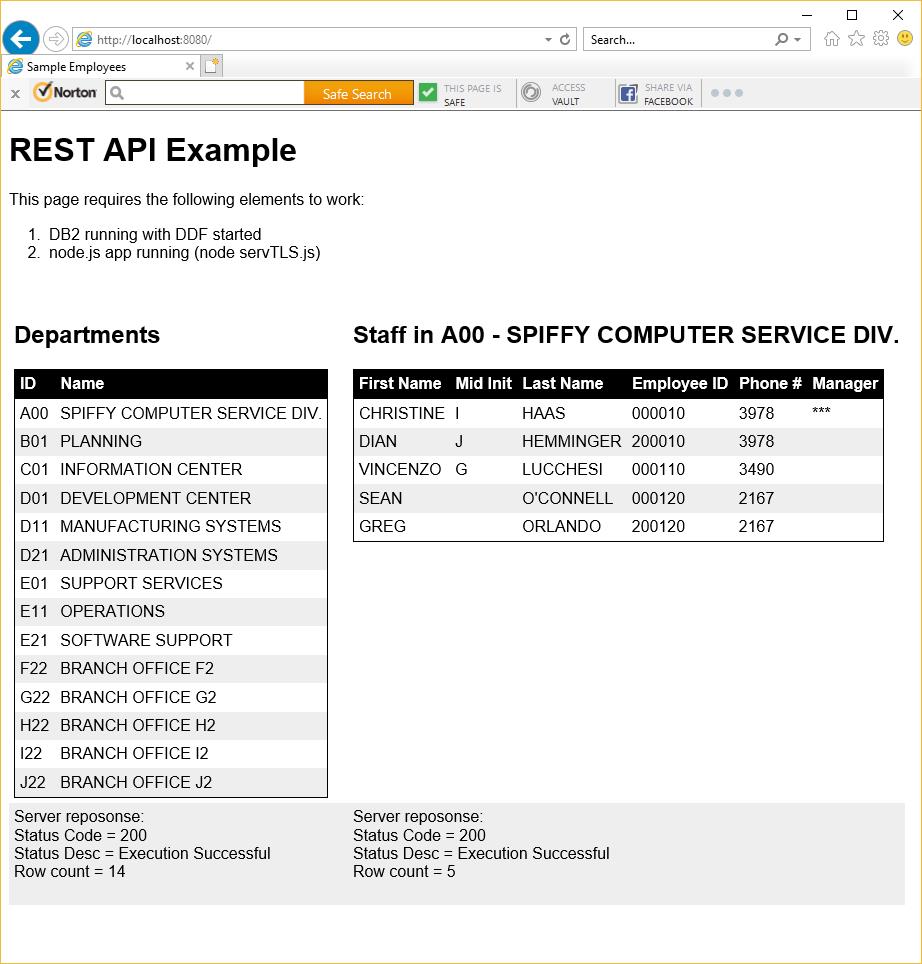
You should see:
Click on one of the departments on the left side, to get a list of employees and phone numbers on the right – e.g. clicking on A00:
Displaying REST Threads
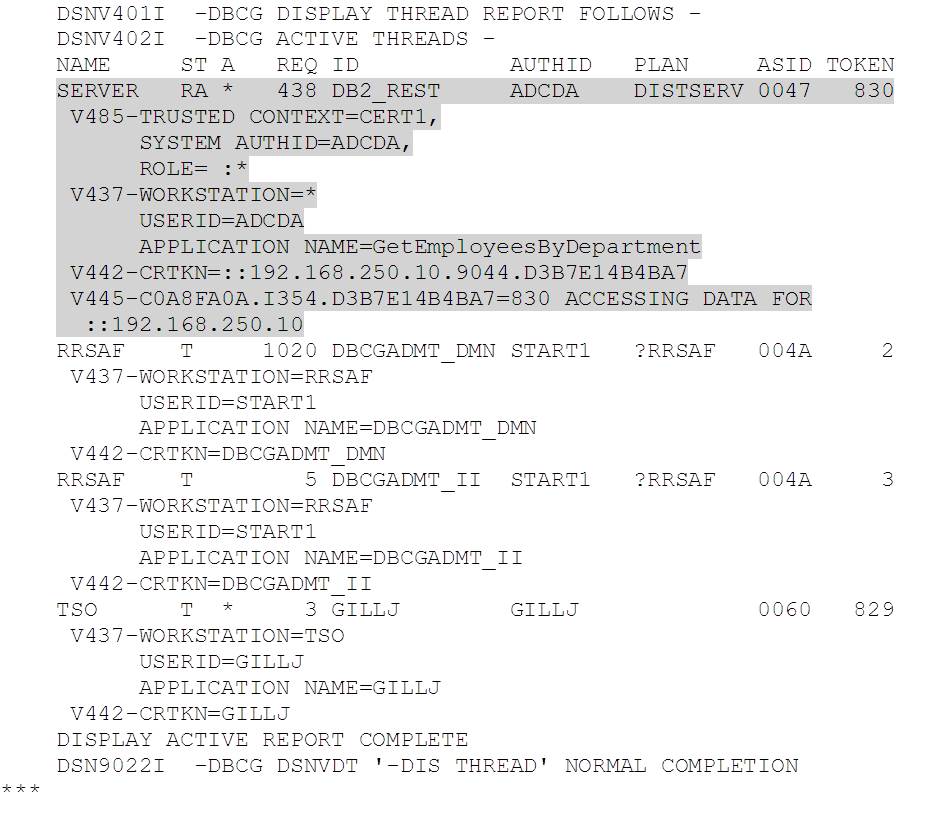
Following some enthusiastic use of Selenium, running 10 client browsers, each performing 50 random department selections, I finally managed to catch a REST client thread in a -DIS THREAD(*) response:
The highlighted thread is running with authid ADCDA (as configured in our client certificate) and is executing the GetEmployeesByDepartment service. The rest of the output is for the DB2 admin scheduler RRS threads and me in TSO issuing the -DIS THREAD(*).
Conclusions
Even with the added complexity of client certificate authentication, node.js provides an easy to read and simple solution to accessing microservices built on the DB2 for z/OS REST API.
Access all of James Gill’s Native REST API blogs here.


