Recently I was running a workshop for some customers to demonstrate various features of DB2 on the Linux platform. Diligently I set up an environment in advance all ready to go the next day, but the gods of live demos were not with me and when I came to connect on the morning of the workshop the server hosting the environment had dropped off the network. With less than half an hour before the workshop started what to do? Cloud and Docker to the rescue! Using Azure and IBM’s Docker image I had an environment set up and ready to go in minutes – here’s a rundown of how I built the environment which might be useful for anyone setting up a test sandbox in a hurry.
Step One – Create a Linux Server
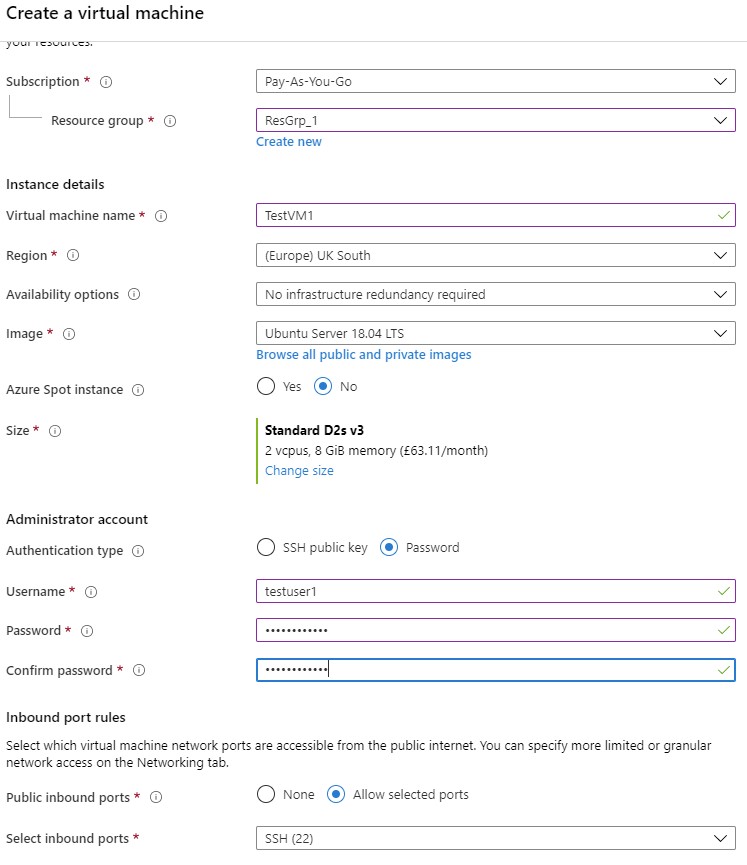
Firstly, log in and go to Create a Resource. I chose Ubuntu 18.04 LTS, filled in the fields for Resource group, Virtual machine name, Username and Password then clicked Review + Create.
There will be a warning that we are leaving the SSH port open to the internet. As this is just a sandbox we can ignore it, but remember to take suitable precautions if you are thinking of putting any ‘real’ data in there.
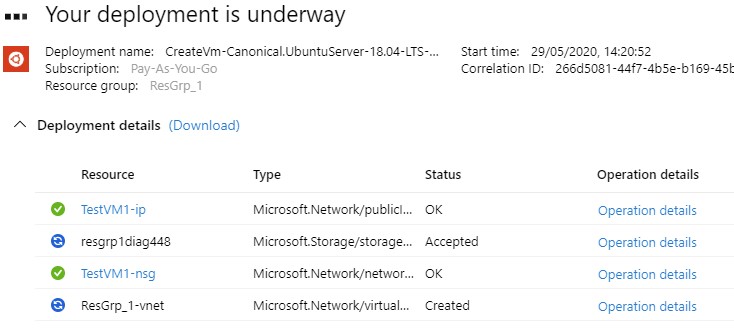
Assuming all the options were accepted, click Create on the Review screen and the deployment will start.
Step Two – Connecting to the Linux Server
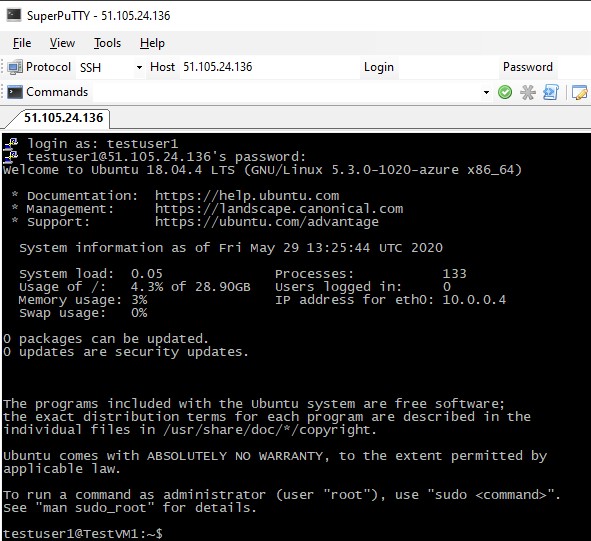
Once the message appears confirming the deployment is complete, click the Go to resource button, and copy the Public IP address from the VM overview screen.
(In case anyone is worried, I’ve not gone mad and put a live IP address in a blog – this VM is long gone!)
Now we can open PuTTY and connect to the server using the username and password specified when we created the VM.
Step Three – Install Docker
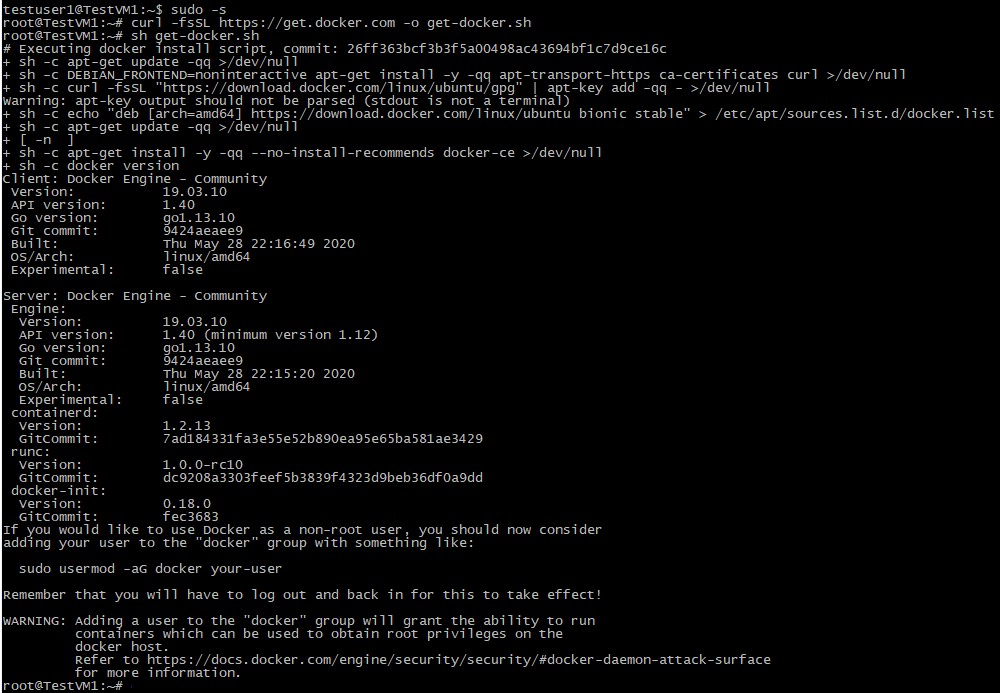
For the fastest installation we can use the convenience script which will do a basic installation along with all the dependencies required. If this wasn’t a sandbox we’d want to do a manual installation and check dependencies, add the Docker repository for updates etc, but in this situation we’re after speed.
sudo -s

curl -fsSL https://get.docker.com -o get-docker.sh

sh get-docker.sh
Step Four – Create DB2 Container
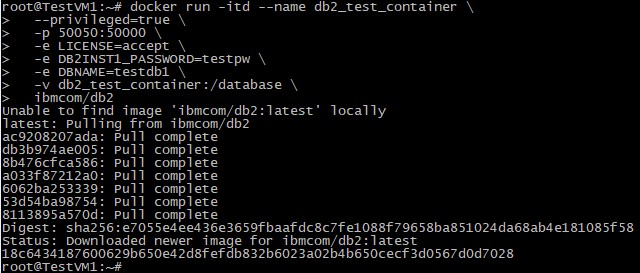
Now Docker is installed it’s a single command to download the DB2 image and start the container:
docker run -itd --name db2_test_container

--privileged=true

-p 50050:50000

-e LICENSE=accept

-e DB2INST1_PASSWORD=testpw

-e DBNAME=testdb1

-v db2_test_container:/database

ibmcom/db2
This command will download the latest image, map port 50050 on the Ubuntu VM to port 50000 in the container, accept the license agreement (everyone has already read the license agreement, right..?), set the password for the db2inst1 user and create a database called testdb1 using storage in /var/lib/docker/volumes/db2_test_container.
Step Five – Connect to the Container
Now the container is running we can connect and start using DB2. Note that when the container starts up there is some setup time while the instance and database are configured so it may be a few minutes until you can connect to the database:
docker exec -ti db2_test_container bash -c "su – db2inst1"

db2 connect to testdb1
And that’s it! You now have a fully functional DB2 installation to use as a sandbox.
Step Six – Destroy the Linux Server
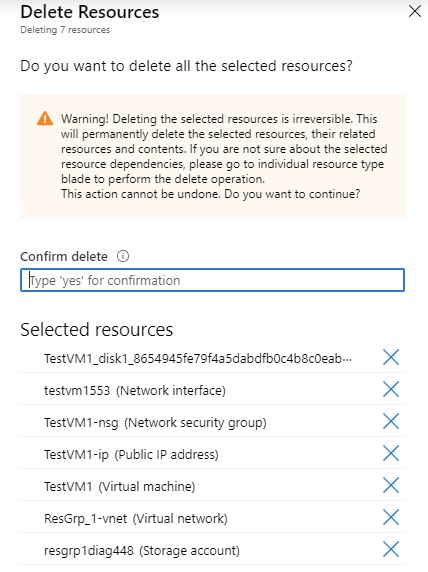
One final step once you are finished with the sandbox is to remove the resources and avoid running up any unnecessary bills. There’s no need to shut anything down or uninstall, simply delete the VM and the associated resources (be careful not to delete anything still being used by other VMs if, for example, you used an existing Storage account or Network security group).
In Summary
For anyone who hasn’t investigated running DB2 in Docker and cloud VMs before hopefully this has helped to illustrate how fast and simple it can be. Although I’ve used Microsoft’s Azure in this example, the same thing could be achieved with any of the major cloud providers.
Here are some links to resources used in this blog:-
- Microsoft Azure: https://azure.microsoft.com/en-gb/
- Install Docker Engine on Ubuntu: https://docs.docker.com/engine/install/ubuntu/
- IBM’s DB2 image on Docker Hub: https://hub.docker.com/r/ibmcom/db2
And finally as a challenge, here’s my quickest time from logging in to Azure to connecting to the test database. Can you beat it?


