Introduction
If you’re thinking of using Jenkins to orchestrate some or all of your DevOps automation, you will need to look at how to produce your own bespoke pipelines, or automation scripts. In Jenkins these are written in Apache’s Groovy language, which is a Java-like scripting language.
In the following sections, we’ll look at Groovy a bit – this isn’t a programming tutorial, and there are plenty of them online! – and at the structure of pipelines. We’re staying focused on the Declarative Pipeline format, which is the newer of the two forms. There is also the Scripted Pipeline form, which is still used extensively, but we want to save on confusion!
Groovy, Baby!
I seriously can’t be expected to write “Groovy” this many times without one Austin Powers reference! The Apache website for Groovy starts here:
and the language documentation can be found here:
https://groovy-lang.org/documentation.html
There are a ton of coding examples available online and plenty of help available from the usual suspects (stackoverflow.com, tutorialspoint.com, etc).
Pipelines – What, Where and How
But first, Why?
Written as Groovy code, the pipeline can be checked into code-control (e.g. git) to allow the build and deploy methods to be managed with the code. They are restartable, and can be programmatically paused waiting for user input or further automated triggering. Coded methods allow for all of that programming goodness – loops, conditional processing and even parallel streams. With shared libraries (see below), we can extend the available functionality as well, creating new capabilities.
Architecture of a pipeline – what’s a step, stage, agent?
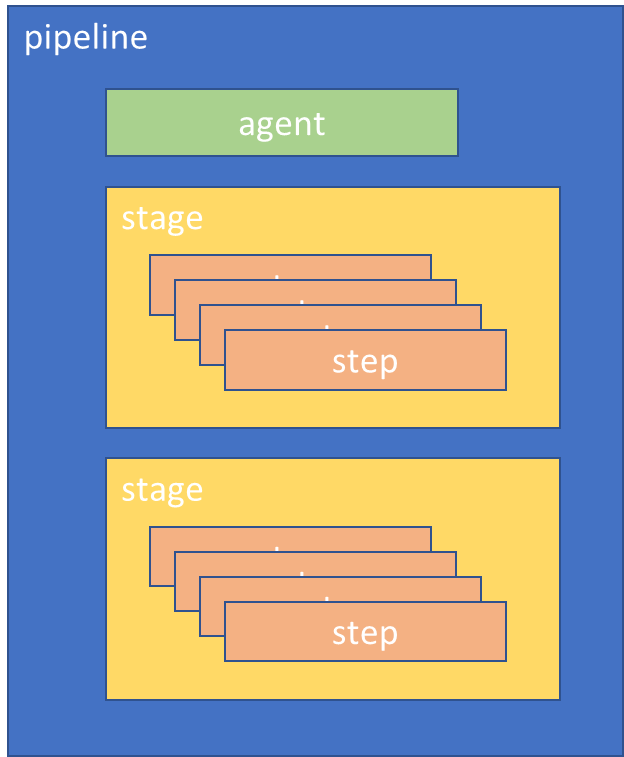
A pipeline is the container that defines the automation process to perform. It is made up of a number of elements that support this:
- Agent – this tells Jenkins what sort of machine the pipeline can run on. Typically controlled by labelling Jenkins slaves to group them into sets of usable groups – e.g. machine1 and machine2 might be labelled “java-build” and machine3 might be “windows-build” to reflect their capabilities. The node stanza in the pipeline selects from these groups.
- Stage – defines a block of tasks that make up a reportable chunk of the work, e.g. build, test, deploy. Jenkins user interfaces display timing information about the pipeline broken down by stage.
- Step – a distinct task or action, e.g. compile program A, copy file A to path B.
The following sections show examples of different types of pipelines, and how we’ve created them:
Example Pipelines
Linear Pipeline
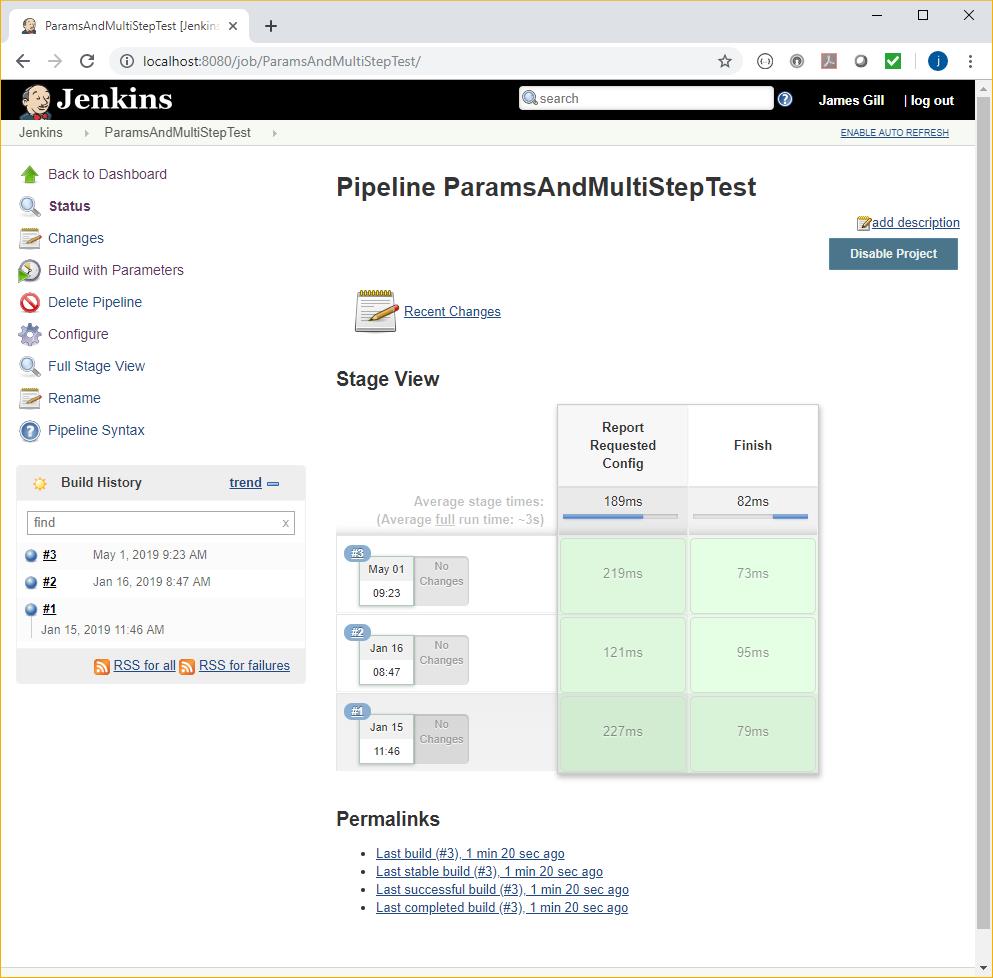
Here’s an example Jenkins project, showing the execution status of the configured stages:
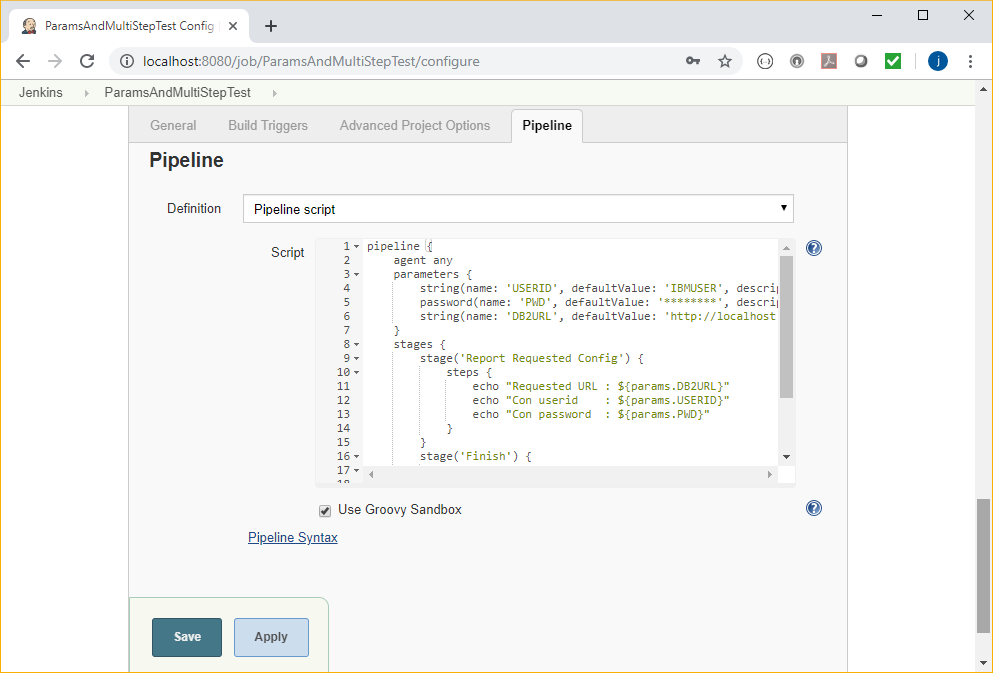
Looking in the Configure section, the pipeline is defined at the bottom of the page:
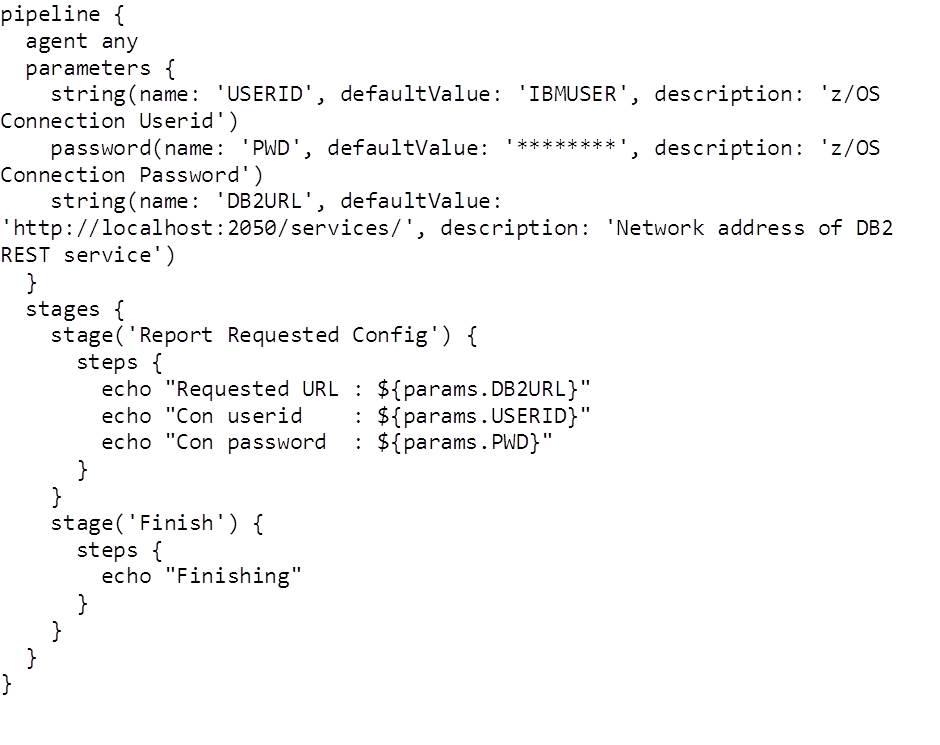
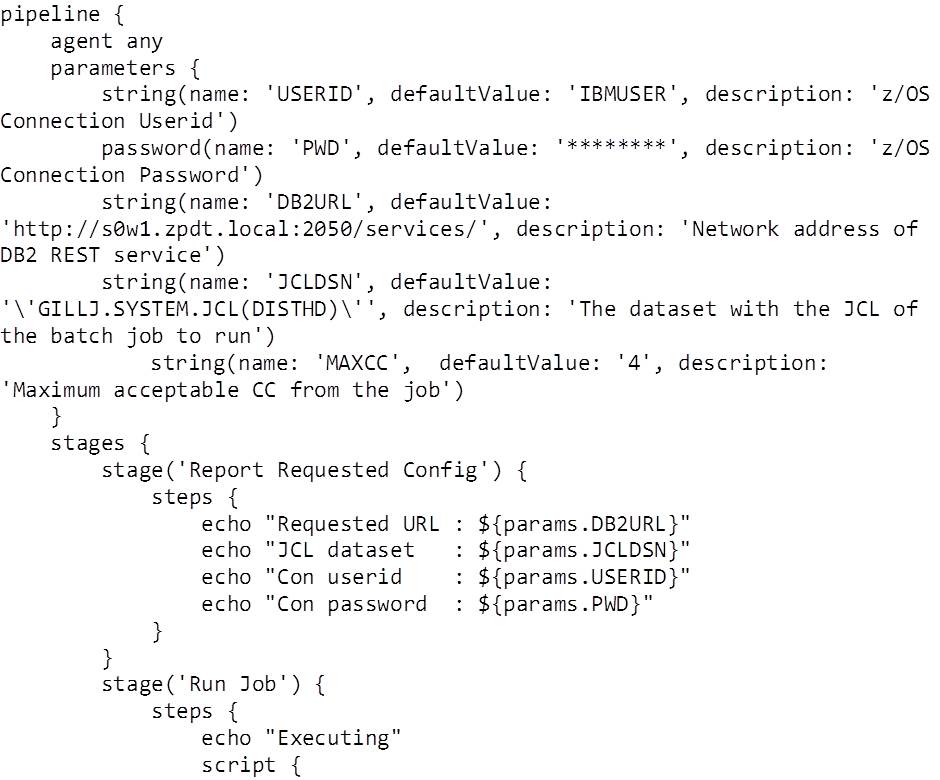
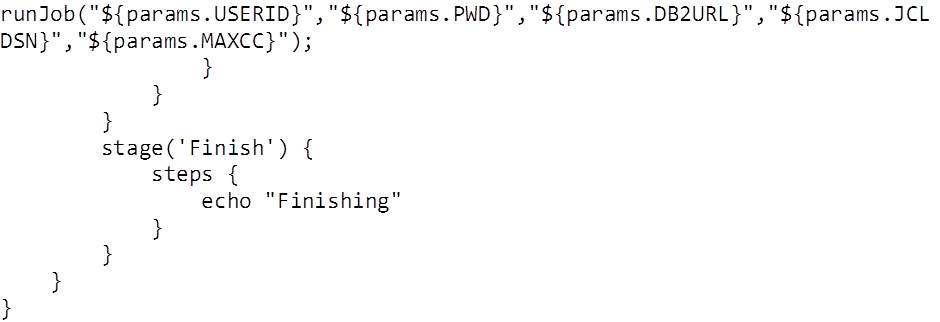
Here’s the whole pipeline script:
Notes:
- The pipeline can run on any agent. This works for us as we only have the (local) slave defined.
- We’ve defined three parameters for this pipeline. Each time you run the pipeline (Build with Parameters from the project screen), Jenkins prompts you for these values.
- We have two stages (which appear in the project run reports), each with a number of steps
Parallel Stream Pipeline
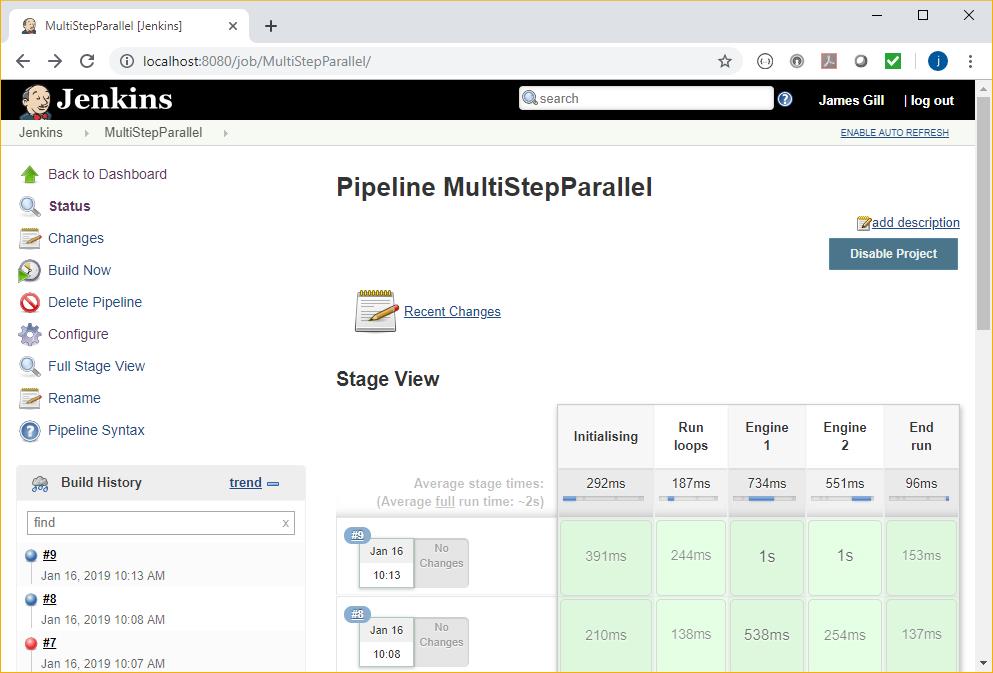
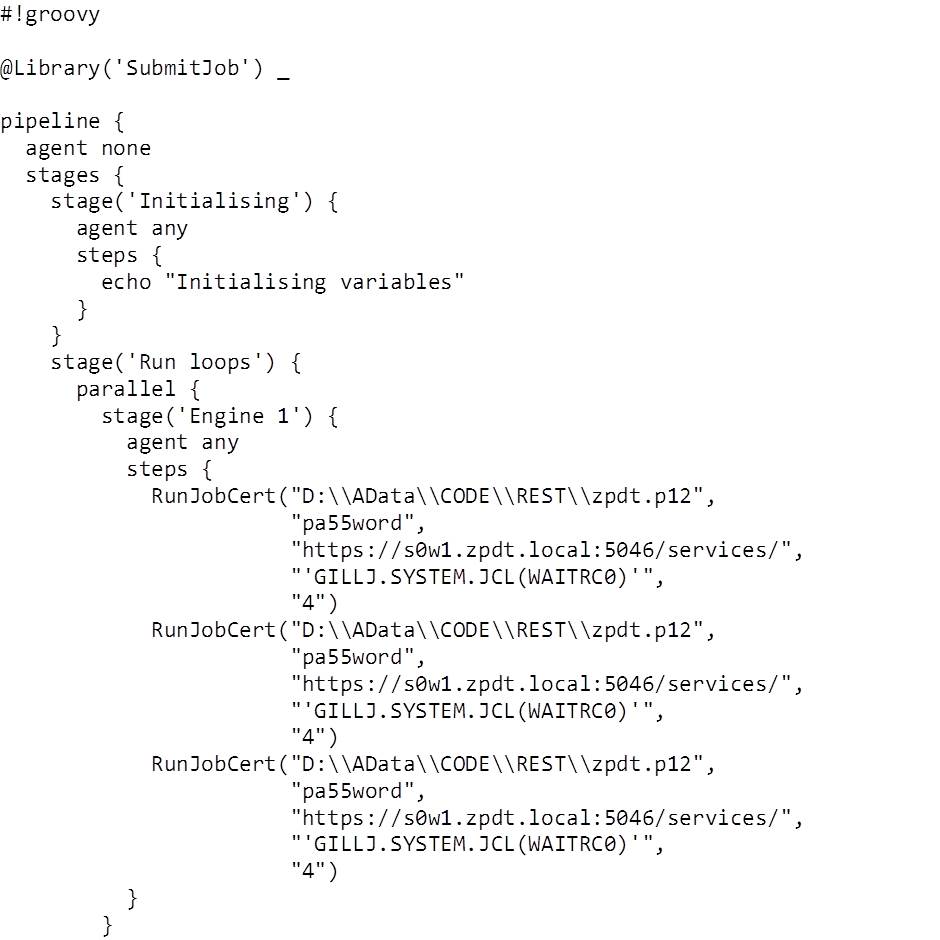
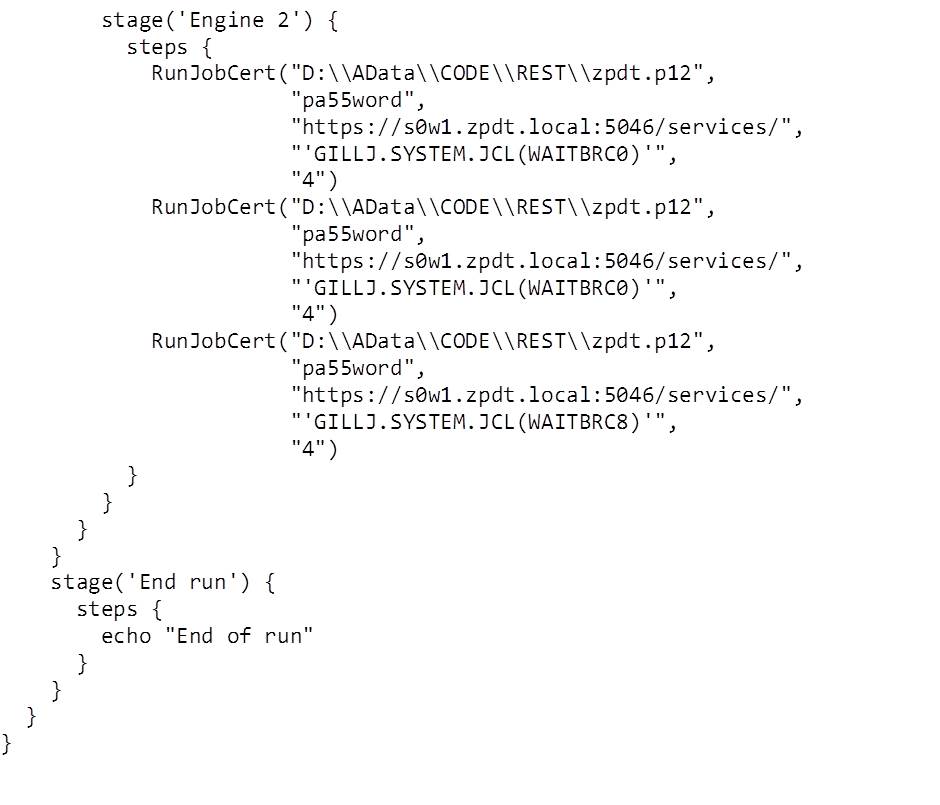
In this example we have two stages (“Engine 1” and “Engine 2”) which are run in parallel:
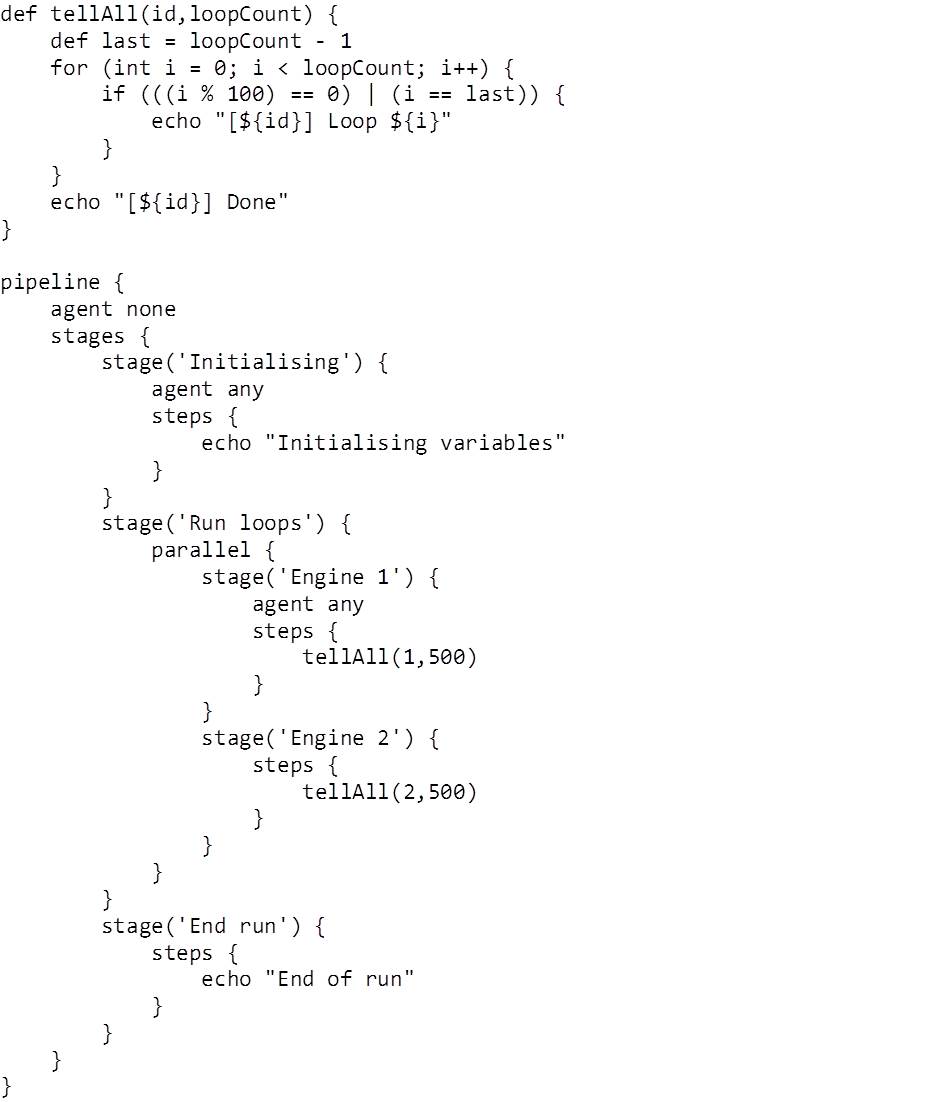
Here’s the pipeline script:
Notes:
- We’ve defined a routine (tellAll()) which can be driven by the pipeline steps.
- The pipeline is made up of four stages, three linear ones which run one after another, and two which run in parallel within one of these. Note stage(‘Run loops’) and the “parallel” statement.
Pipeline in Jenkinsfile
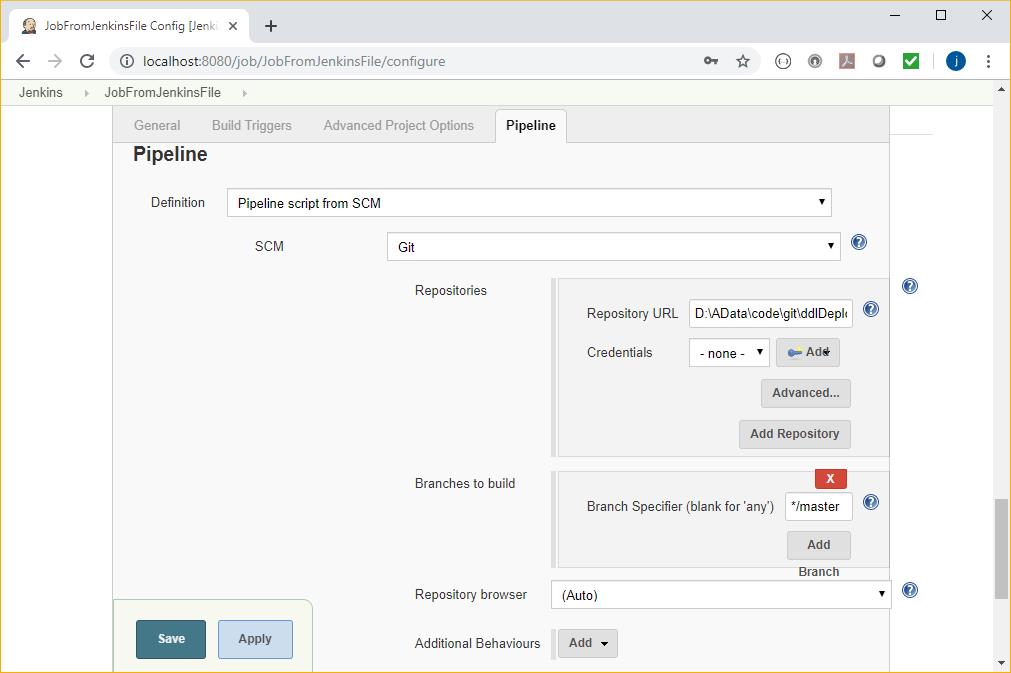
In this example, the pipeline that will be used is stored with the project in Git in the file Jenkinsfile. This is retrieved at the beginning of the run. The benefit of this approach is that we keep the application code and the build / test / deploy methodology in the same version controlled environment.
It’s configured like this:
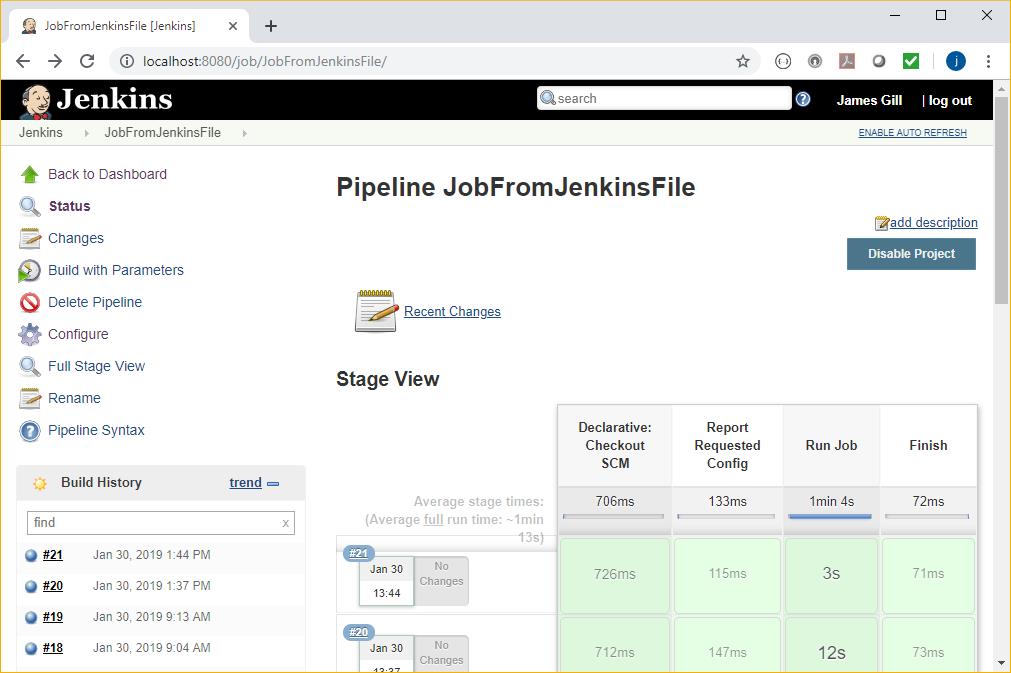
And the operation begins with the checkout – as shown in the project view:
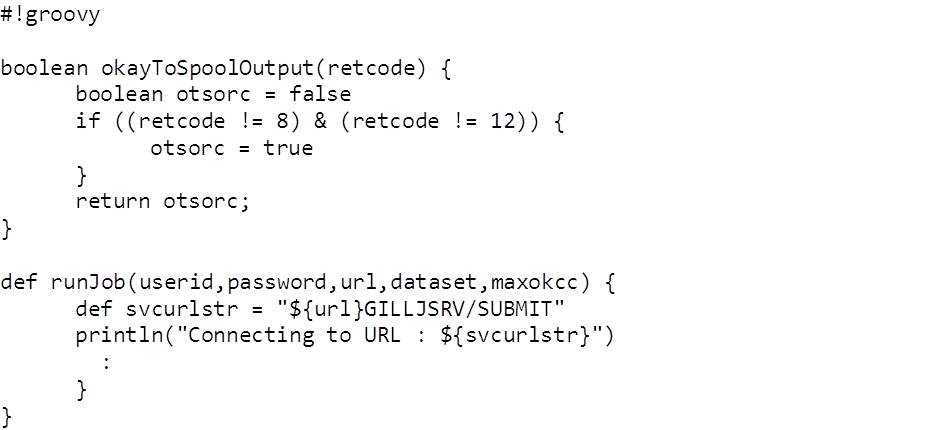
In this case there are three linear stages in the checked out Jenkinsfile:
Notes:
- We have two routines defined in this pipeline: okayToSPoolOutput() and runJob() – I’ve truncated the latter to save a bit of space.
Shared Libraries
When we use a pipeline routine a lot, it can be a nuisance managing the many different copies of it in all of the different Jenkinsfiles spread throughout git. To avoid this proliferation and maintenance headache, Jenkins has Shared Libraries. These are collections of routines that are available to all pipelines.
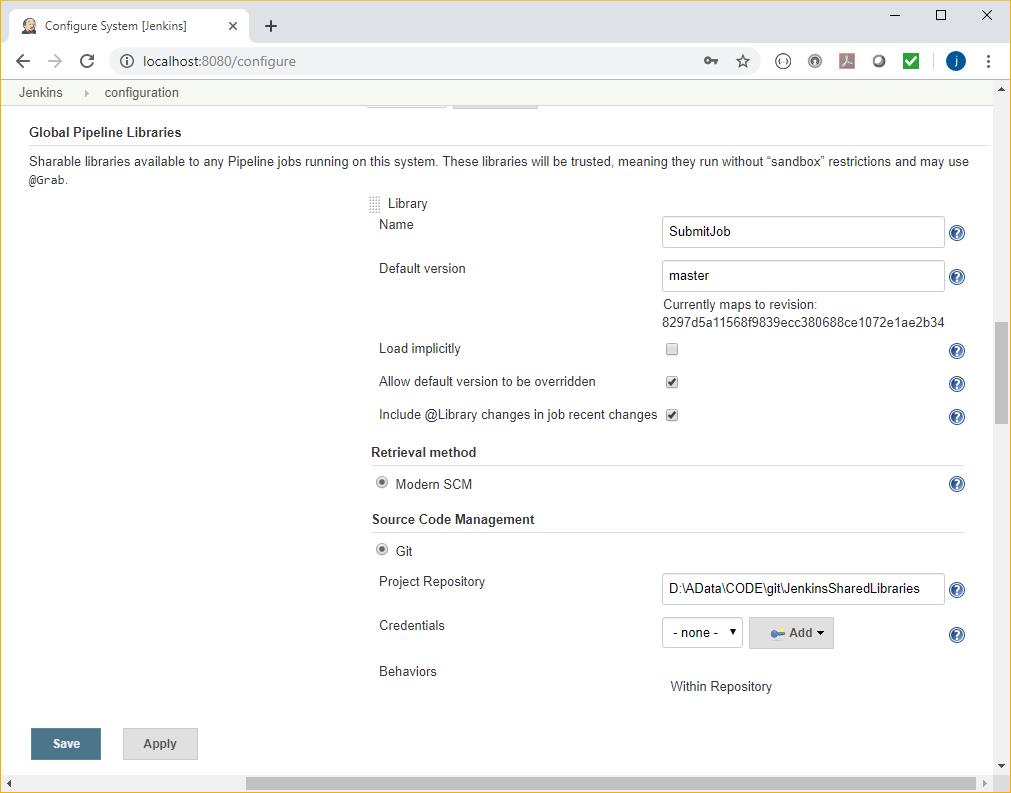
To use these, they first of all have to be configured by your Jenkins administrator in Jenkins -> Configuration:
In this example, we have created a shared library called SubmitJob, which is held in a local Git repository. The repository has two subdirectories that are used to support this:
- vars which is nominally for global scope variables (more on this in a moment), and;
- src which is intended to be architected like a Java source directory
There are lots of opinions and thoughts about which to use and why. We like var, as we define the routines in there and they are available without needing to instantiate (new) to use them.
As a result – in our example – the SubmitJob shared library source routines can all be found in:
D:ADataCODEgitJenkinsSharedLibrariesvars
Each routine has its own file – routine.groovy. In the example Jenkinsfile pipeline, below, we use a routine called RunJobCert() which is in:
D:ADataCODEgitJenkinsSharedLibrariesvarsRunJobCert.groovy
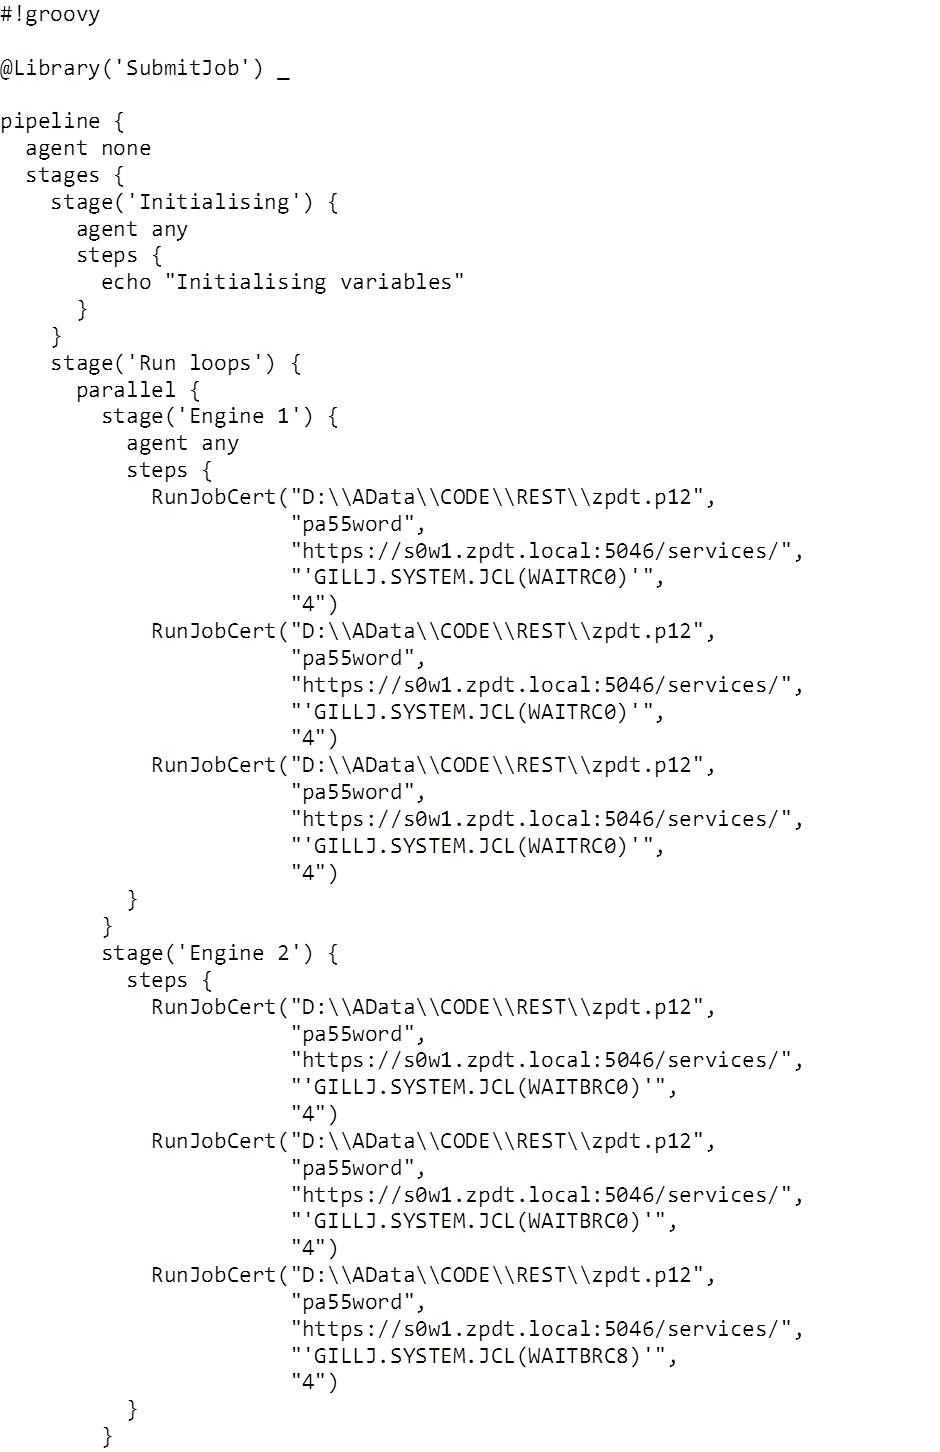
To use this in the pipeline, we first need to reference this specific Shared Library, like this:
The underscore (“_”) replaces the need for an “import” statement (as we’re using global variable shared libraries).
Now the RunJobCert() routine can be called directly in the code:
Conclusions
The combination of a simple to use interface and the huge flexibility of Groovy makes Jenkins the popular tool that it is today. When the pipelines are integrated with the application code SCM using Jenkinsfiles, it is difficult to see why you wouldn’t be using this to orchestrate your project activities.
In the next blog, we’ll look at how to install and configure a Jenkins slave running on z/OS.
 About: James Gill – Principal Consultant
Favourite topics – Data Sharing, DB2 pureScale, Sailing.
A multi-talented database consultant, James works with both DB2 for z/OS and DB2 for Midrange systems.
James is our resident DB2 pureScale expert having spent time in the IBM Boeblingen labs and running our own DB2 pureScale environment for R&D. Having worked with Data Sharing on the mainframe for many years James has been able to combine his knowledge of DB2 on Midrange and DB2 on z/OS to gain valuable skills in DB2 pureScale.
Most recently James has been working on a high profile DB2 z/OS data integration project for a major UK Financial Institution.
When he’s not sailing on the Norfolk Broads James can be found working on Triton’s zPDT carrying out various R&D projects.
